Shader examples: Difference between revisions
No edit summary |
m (http > https) |
||
| (25 intermediate revisions by 3 users not shown) | |||
| Line 1: | Line 1: | ||
This page contains some example shader resources to try | This page contains some example shader resources to try. If you are looking to make your own, please be sure to read about the [[Shader|shader element]] as well. | ||
<br> | <br> | ||
__TOC__ | __TOC__ | ||
| Line 5: | Line 5: | ||
[[Image:RoadShineScreen.jpg|200px|thumb|left|Road shine]] | [[Image:RoadShineScreen.jpg|200px|thumb|left|Road shine]] | ||
<table border=0><tr><td valign=top height=170> | <table border=0><tr><td valign=top height=170> | ||
[ | [https://nightly.mtasa.com/files/shaders/shader_roadshine.zip Download shader_roadshine.zip] ''Requires Shader Model 2 graphics card'' | ||
<br><br> | <br><br> | ||
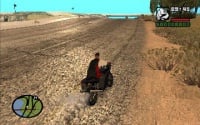
This resource creates a light reflection effect on the ground (looks best when moving). | This resource creates a light reflection effect on the ground (looks best when moving). | ||
It uses a custom flag in the effect file to generate [ | It uses a custom flag in the effect file to generate [https://en.wikipedia.org/wiki/Surface_normal surface normals] for the ground model: | ||
<syntaxhighlight lang="lua"> | <syntaxhighlight lang="lua"> | ||
int CUSTOMFLAGS | int CUSTOMFLAGS | ||
| Line 20: | Line 20: | ||
[[Image:RoadShine2Screen.jpg|200px|thumb|left|Road shine 2]] | [[Image:RoadShine2Screen.jpg|200px|thumb|left|Road shine 2]] | ||
<table border=0><tr><td valign=top height=170> | <table border=0><tr><td valign=top height=170> | ||
[ | [https://nightly.mtasa.com/files/shaders/shader_roadshine2.zip Download shader_roadshine2.zip] ''Requires Shader Model 2 graphics card'' | ||
<br><br> | <br><br> | ||
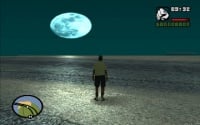
Bit more complicated than the first Road shine, as it tracks the sun or moon to calculate the position of the highlight. | Bit more complicated than the first Road shine, as it tracks the sun or moon to calculate the position of the highlight. | ||
| Line 26: | Line 26: | ||
<br><br> | <br><br> | ||
Best used with the play resource as the model it modifies is near the initial spawn point. | Best used with the play resource as the model it modifies is near the initial spawn point. | ||
</td></tr></table> | |||
==Road shine 3 (Deluxe edition)== | |||
[[Image:RoadShine3Screen.jpg|200px|thumb|left|Road shine 3]] | |||
<table border=0><tr><td valign=top height=170> | |||
[https://nightly.mtasa.com/files/shaders/shader_roadshine3.zip Download shader_roadshine3.zip] ''Requires Shader Model 2 graphics card'' | |||
<br><br> | |||
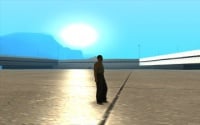
This resource shows how to: | |||
* Stop a wild card match shader from being applied to certain world textures. | |||
* Use isLineOfSightClear to stop an effect when something is not visible (The sun in this case). | |||
* Use a shader maxDrawDistance setting to avoid GPU overload. | |||
The final effect is a faster shader with less rendering issues than the previous two road shine examples. | |||
<br><br> | |||
</td></tr></table> | </td></tr></table> | ||
| Line 31: | Line 45: | ||
[[Image:UVScollScreen.jpg|200px|thumb|left|UV scroll]] | [[Image:UVScollScreen.jpg|200px|thumb|left|UV scroll]] | ||
<table border=0><tr><td valign=top height=170> | <table border=0><tr><td valign=top height=170> | ||
[ | [https://nightly.mtasa.com/files/shaders/shader_uv_scroll.zip Download shader_uv_scroll.zip] | ||
<br><br> | <br><br> | ||
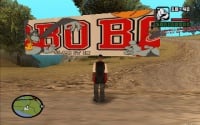
This resource scrolls a texture from left to right. It doesn't use vertex or pixels shaders, so it should work on all hardware. | This resource scrolls a texture from left to right. It doesn't use vertex or pixels shaders, so it should work on all hardware. | ||
| Line 39: | Line 53: | ||
[[Image:UVScriptedScreen.jpg|200px|thumb|left|UV scripted]] | [[Image:UVScriptedScreen.jpg|200px|thumb|left|UV scripted]] | ||
<table border=0><tr><td valign=top height=170> | <table border=0><tr><td valign=top height=170> | ||
[ | [https://nightly.mtasa.com/files/shaders/shader_uv_scripted.zip Download shader_uv_scripted.zip] | ||
<br><br> | <br><br> | ||
This resource controls a texture's UVs using Lua. It shows that anything is possible if you can imagine it. | This resource controls a texture's UVs using Lua. It shows that anything is possible if you can imagine it. | ||
</td></tr></table> | </td></tr></table> | ||
| Line 67: | Line 61: | ||
[[Image:CarPaintScreen.jpg|200px|thumb|left|Car paint]] | [[Image:CarPaintScreen.jpg|200px|thumb|left|Car paint]] | ||
<table border=0><tr><td valign=top height=170> | <table border=0><tr><td valign=top height=170> | ||
[ | [https://nightly.mtasa.com/files/shaders/shader_car_paint.zip Download shader_car_paint.zip] ''Requires Shader Model 2 graphics card'' | ||
<br><br> | <br><br> | ||
This resource shows you how to apply a shader to the vehicle models. The shader itself is not that great, so don't get your hopes up. | This resource shows you how to apply a shader to the vehicle models. The shader itself is not that great, so don't get your hopes up. | ||
| Line 75: | Line 69: | ||
[[Image:WaterScreen.jpg|200px|thumb|left|Water]] | [[Image:WaterScreen.jpg|200px|thumb|left|Water]] | ||
<table border=0><tr><td valign=top height=170> | <table border=0><tr><td valign=top height=170> | ||
[ | [https://nightly.mtasa.com/files/shaders/shader_water.zip Download shader_water.zip] ''Requires Shader Model 2 graphics card'' | ||
<br><br> | <br><br> | ||
This resource applies a shader to the GTA world water. The Lua script shows how to use a timer to transfer the conventional water color setting to the shader. | This resource applies a shader to the GTA world water. The Lua script shows how to use a timer to transfer the conventional water color setting to the shader. | ||
| Line 83: | Line 77: | ||
[[Image:BloomScreen.jpg|200px|thumb|left|Bloom]] | [[Image:BloomScreen.jpg|200px|thumb|left|Bloom]] | ||
<table border=0><tr><td valign=top height=170> | <table border=0><tr><td valign=top height=170> | ||
[ | [https://nightly.mtasa.com/files/shaders/shader_bloom.zip Download shader_bloom.zip] ''Requires Shader Model 2 graphics card'' | ||
<br><br> | <br><br> | ||
This resource shows you how 'bounce' full screen effects using a render target pool. It | This resource shows you how 'bounce' full screen effects using a render target pool. It uses the ''onClientHUDRender'' event to exclude the HUD from the effect. | ||
</td></tr></table> | </td></tr></table> | ||
| Line 91: | Line 85: | ||
[[Image:BlockWorld.jpg|200px|thumb|left|Block world]] | [[Image:BlockWorld.jpg|200px|thumb|left|Block world]] | ||
<table border=0><tr><td valign=top height=170> | <table border=0><tr><td valign=top height=170> | ||
[ | [https://nightly.mtasa.com/files/shaders/shader_block_world.zip Download shader_block_world.zip] ''Requires Shader Model 2 graphics card'' | ||
<br><br> | <br><br> | ||
This resource makes the textures look all blocky. It also changes colors when the 'k' key is pressed. | This resource makes the textures look all blocky. It also changes colors when the 'k' key is pressed. | ||
</td></tr></table> | |||
==Texture names== | |||
[[Image:TexNames.jpg|200px|thumb|left|Texture names]] | |||
<table border=0><tr><td valign=top height=170> | |||
[https://nightly.mtasa.com/files/shaders/shader_tex_names.zip Download shader_tex_names.zip] | |||
<br><br> | |||
This resource is only a tool, and doesn't do anything pretty. It shows a list of the current visible texture names, and highlights the selected texture. Ideal for finding a texture name to use with [[engineApplyShaderToWorldTexture]]. | |||
num_8 shows/hides the texture list, num_7 and num_9 step through the list, and 'k' copies the current texture name to the clipboard. | |||
</td></tr></table> | |||
==Skid marks== | |||
[[Image:SkidMarks.jpg|200px|thumb|left|Skid marks]] | |||
<table border=0><tr><td valign=top height=170> | |||
[https://nightly.mtasa.com/files/shaders/shader_skidmarks.zip Download shader_skidmarks.zip] ''Requires Shader Model 2 graphics card'' | |||
<br><br> | |||
This resource shows you how to do multiple passes in a shader, and input different variables to the vertex shader for each pass. | |||
Use the command '''/skidmarks 1-4''' to see the different effects. (You have skid a car to see it!) | |||
<br><br> | |||
</td></tr></table> | |||
==HDR contrast== | |||
[[Image:ShaderContrast.jpg|200px|thumb|left|HDR contrast]] | |||
<table border=0><tr><td valign=top height=170> | |||
[https://nightly.mtasa.com/files/shaders/shader_contrast.zip Download shader_contrast.zip] ''Requires Shader Model 2 graphics card'' | |||
<br><br> | |||
This resource applies a 'High Dynamic Range' contrast effect. It uses a 1 pixel render target to sample the whole scene, and then uses that to brighten or darken the next frame. | |||
So going into somewhere dark will automatically brighten the scene, and visa versa | |||
<br><br> | |||
</td></tr></table> | |||
==Tessellation== | |||
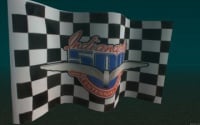
[[Image:shader_flag.jpg|200px|thumb|left|Tessellation action]] | |||
<table border=0><tr><td valign=top height=170> | |||
[https://nightly.mtasa.com/files/shaders/shader_flag.zip Download shader_flag.zip] ''Requires Shader Model 2 graphics card'' | |||
<br><br> | |||
This resource shows how to use shader tessellation to animate the shape of a dxDrawImage and use shader transform to give it a 3rd dimension. | |||
The example has a GUI (press numpad-8) so you can fiddle with the settings. | |||
<br><br> | |||
</td></tr></table> | |||
==Radial blur== | |||
[[Image:shader_radial_blur.jpg|200px|thumb|left|Radial blur]] | |||
<table border=0><tr><td valign=top height=170> | |||
[https://nightly.mtasa.com/files/shaders/shader_radial_blur.zip Download shader_radial_blur.zip] ''Requires Shader Model 2 graphics card'' | |||
<br><br> | |||
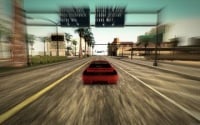
This resource sort of looks a little bit like the GTAIV motion blur you get when you move the mouse quickly, or drive a fast car. The fast car effect is a bit more subtle than the screen shot would suggest, as it leaves the center of the screen nice and clear so you can see where you are going. | |||
It also has the option of suspending the effect during times of low FPS. Check the two settings at the top of '''''c_radial_blur.lua'''''. | |||
<br><br> | |||
The file '''''c_switch.lua''''' contains information on how to toggle the effect from another resource using events. | |||
<br><br> | |||
</td></tr></table> | |||
==Detail== | |||
[[Image:shader_detail.jpg|200px|thumb|left|Detail]] | |||
<table border=0><tr><td valign=top height=170> | |||
[https://nightly.mtasa.com/files/shaders/shader_detail.zip Download shader_detail.zip] ''Requires Shader Model 2 graphics card'' | |||
<br><br> | |||
Applies a few monochrome detail textures, at various scales, to (parts of) the world. | |||
(Not finished and probably never will be.) | |||
</td></tr></table> | |||
==Ped morph== | |||
[[Image:PedMorphScreen.jpg|200px|thumb|left|Ped morph]] | |||
<table border=0><tr><td valign=top height=170> | |||
[https://nightly.mtasa.com/files/shaders/shader_ped_morph.zip Download shader_ped_morph.zip] ''Requires Shader Model 2 graphics card'' | |||
<br><br> | |||
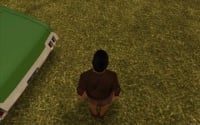
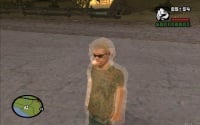
This resource uses a vertex shader to modify the geometry of a ped model as it is rendered. | |||
<br><br> | |||
When the resource has started, use the 'k' and 'l' keys to change morph size. | |||
</td></tr></table> | |||
==Ped shell== | |||
[[Image:PedShellScreen.jpg|200px|thumb|left|Ped shell]] | |||
<table border=0><tr><td valign=top height=170> | |||
[https://nightly.mtasa.com/files/shaders/shader_ped_shell.zip Download shader_ped_shell.zip] ''Requires Shader Model 2 graphics card'' | |||
<br><br> | |||
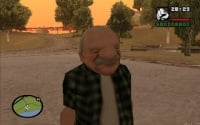
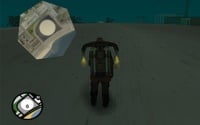
This resource draws a translucent effect as a shader layer. The first pass is done by GTA, and the vertex shader is only applied in the second to add the effect 'on top' of the standard output. | |||
<br><br> | |||
When the resource has started, use the 'm' key to see the shell effect. | |||
</td></tr></table> | |||
==Hud mask== | |||
[[Image:Shader_hud_mask.jpg|200px|thumb|left|Hud mask]] | |||
<table border=0><tr><td valign=top height=170> | |||
[https://nightly.mtasa.com/files/shaders/shader_hud_mask.zip Download shader_hud_mask.zip] | |||
<br><br> | |||
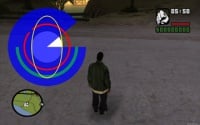
This resource shows how to draw a hud texture with a shape mask. | |||
</td></tr></table> | |||
==dxDrawCircle== | |||
[[Image:dxDrawCircle.jpg|200px|thumb|left|dxDrawCircle]] | |||
<table border=0><tr><td valign=top height=170> | |||
[https://nightly.mtasa.com/files/shaders/shader_circle.zip Download shader_circle.zip] | |||
<br><br> | |||
This resource exports a 'dxDrawCircle' function for use in your own scripts. | |||
<br><br> | |||
Example resource calling dxDrawCircle function from shader_circle: [https://nightly.mtasa.com/files/shaders/circle_example.zip circle_example.zip] | |||
</td></tr></table> | </td></tr></table> | ||
Latest revision as of 18:51, 25 March 2021
This page contains some example shader resources to try. If you are looking to make your own, please be sure to read about the shader element as well.
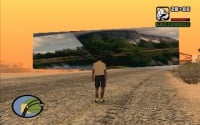
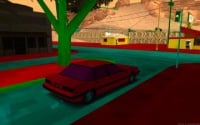
Road shine
|
Download shader_roadshine.zip Requires Shader Model 2 graphics card
int CUSTOMFLAGS
<
    string createNormals = "yes";
>;
Surface normals are not usually present in the ground and building models, but are useful for creating lighting effects such as these. |
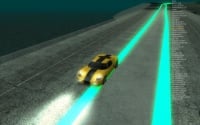
Road shine 2
|
Download shader_roadshine2.zip Requires Shader Model 2 graphics card
|
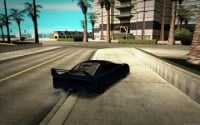
Road shine 3 (Deluxe edition)
|
Download shader_roadshine3.zip Requires Shader Model 2 graphics card
The final effect is a faster shader with less rendering issues than the previous two road shine examples.
|
UV scroll
|
Download shader_uv_scroll.zip
|
UV scripted
|
Download shader_uv_scripted.zip
|
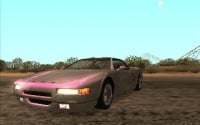
Car paint
|
Download shader_car_paint.zip Requires Shader Model 2 graphics card
|
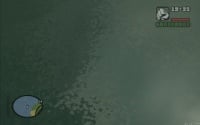
Water
|
Download shader_water.zip Requires Shader Model 2 graphics card
|
Bloom
|
Download shader_bloom.zip Requires Shader Model 2 graphics card
|
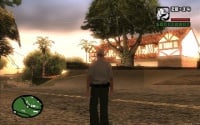
Block world
|
Download shader_block_world.zip Requires Shader Model 2 graphics card
|
Texture names
|
Download shader_tex_names.zip
num_8 shows/hides the texture list, num_7 and num_9 step through the list, and 'k' copies the current texture name to the clipboard. |
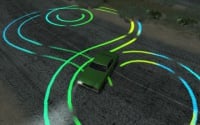
Skid marks
|
Download shader_skidmarks.zip Requires Shader Model 2 graphics card
|
HDR contrast
|
Download shader_contrast.zip Requires Shader Model 2 graphics card
|
Tessellation
|
Download shader_flag.zip Requires Shader Model 2 graphics card
The example has a GUI (press numpad-8) so you can fiddle with the settings.
|
Radial blur
|
Download shader_radial_blur.zip Requires Shader Model 2 graphics card
It also has the option of suspending the effect during times of low FPS. Check the two settings at the top of c_radial_blur.lua.
|
Detail
|
Download shader_detail.zip Requires Shader Model 2 graphics card
(Not finished and probably never will be.) |
Ped morph
|
Download shader_ped_morph.zip Requires Shader Model 2 graphics card
|
Ped shell
|
Download shader_ped_shell.zip Requires Shader Model 2 graphics card
|
Hud mask
|
Download shader_hud_mask.zip
|
dxDrawCircle
|
Download shader_circle.zip
|
