PL/Client Manual: Difference between revisions
| Line 51: | Line 51: | ||
[[Image:MENU_QuickConnect.jpg]] | [[Image:MENU_QuickConnect.jpg]] | ||
| width="380" | | | width="380" | | ||
<font size="-1" face="tahoma,helvetica,arial,sans-serif">'''Quick connect''' – | <font size="-1" face="tahoma,helvetica,arial,sans-serif">'''Quick connect''' – Przy pomocy tej opcji możesz połączyć się z serwerem gry, którego adres IP lub URL oraz Port znasz. opcja jest bardzo przydatna, jeżeli znasz adres i port serwera i nie chce Ci się szukać go pośród innych serwerów w wyszukiwarce.</font> | ||
<br /> | <br /> | ||
| Line 58: | Line 58: | ||
[[Image:Server_Browser.jpg|280px]] | [[Image:Server_Browser.jpg|280px]] | ||
| width="380" | | | width="380" | | ||
<font size="-1" face="tahoma,helvetica,arial,sans-serif">'''Browse servers''' – | <font size="-1" face="tahoma,helvetica,arial,sans-serif">'''Browse servers''' – Dzięki tej opcji masz dostęp do listy wszystkich działających serwerów. </font> | ||
<br /> | <br /> | ||
| Line 65: | Line 65: | ||
[[Image:Host_Game.jpg|280px]] | [[Image:Host_Game.jpg|280px]] | ||
| width="380" | | | width="380" | | ||
<font size="-1" face="tahoma,helvetica,arial,sans-serif">'''Host game''' – | <font size="-1" face="tahoma,helvetica,arial,sans-serif">'''Host game''' – Dzięki tej opcji możesz założyć własny serwer. </font> | ||
<br /> | <br /> | ||
| Line 72: | Line 72: | ||
[[Image:Menu_Settings.JPG|280px]] | [[Image:Menu_Settings.JPG|280px]] | ||
| width="380" | | | width="380" | | ||
<font size="-1" face="tahoma,helvetica,arial,sans-serif">'''Settings '''– | <font size="-1" face="tahoma,helvetica,arial,sans-serif">'''Settings '''– Tutaj możesz zmienić m.in: swój nick używany w grze, klawisze, opcje grafiki i kilka innych rzeczy.</font> | ||
<br /><br /> | <br /><br /> | ||
| Line 86: | Line 86: | ||
[[Image:Map_Editor.jpg|280px]] | [[Image:Map_Editor.jpg|280px]] | ||
| width="380" | | | width="380" | | ||
<font size="-1" face="tahoma,helvetica,arial,sans-serif">'''Map editor '''– | <font size="-1" face="tahoma,helvetica,arial,sans-serif">'''Map editor '''– Tutaj możesz tworzyć własne mapy, wstawiać checkpointy, rampy, pickupy i inne obiekty. później możesz to dodać do plików serwera i grać z innymi graczami na świeżo zrobionych mapach.</font> | ||
<br /><br /> | <br /><br /> | ||
| Line 93: | Line 93: | ||
<br> | <br> | ||
| width="380" | | | width="380" | | ||
<font size="-1" face="tahoma,helvetica,arial,sans-serif">'''Quit '''– | <font size="-1" face="tahoma,helvetica,arial,sans-serif">'''Quit '''– Wybranie tej opcji spowoduje zamknięcie MTA i powrót do pulpitu.</font> | ||
<br /><br /> | <br /><br /> | ||
|} | |} | ||
Najprostszym sposobem by grać, jest wybranie opcji '''Browse Servers''' z menu. Jeżeli serwery się nie wyświetlają kliknij przycisk '''Refresh''', a MTA zacznie szukać serwerów, a następnie je wyświetli w formie listy. | |||
* | * W kolumnie '''Name''' są wyświetlane nazwy serwerów. | ||
* | * W kolumnie '''Players''' wyświetla się liczba graczy grających i maksymalna mogąca wejść na serwer w formacie [Liczba slotów zajętych] / [Liczba maksymalna slotów]. | ||
* | * W kolumnie '''Ping''' jest wyświetlany Ping (opóźnienie) miedzy Twoją maszyną, a maszyną serwera. Ping to miara czasu, w jakim "pakiety" danych są przesyłane od Ciebie na serwer i spowrotem, czyli większy ping oznacza dłuższy czas wędrówki pakietów, a tym samym lag. Generalnie serwery usytuowane bliżej Ciebie mają mniejsze pingi. | ||
* | * W kolumnie '''Host''' jest podany adres IP serwerów. mozesz używać tego adresu by później łączyć się z danym serwerem przy pomocy opcji '''Quick connect''' z głownego menu. | ||
Each tab can be clicked to arrange the respective column in ascending or descending order. | Each tab can be clicked to arrange the respective column in ascending or descending order. | ||
Revision as of 23:37, 25 March 2010
Wprowadzenie
Multi Theft Auto: San Andreas to najnowszy z serii mod multiplayer pisany przez fanów serii gier Grand Theft Auto (tylko wersja na PC). Wersja do GTA3 i Vice City działająca na starszym rdzeniu dostępna pod adresem http://www.multitheftauto.com. Ten mod nie jest wspierany przez Rockstar Games ani Take 2 Interactive.
Zanim zaczniesz
Zanim zainstalujesz Multi Theft Auto: San Andreas upewnij się, że nie masz zainstalowanych modów do GTA:SA. Mody będą kolidować z MTA. Jeżeli mimo wszystko chcesz zachować mody z singleplayer'a, możesz zainstalować GTA:SA po raz drugi w innej lokalizacji na dysku twardym.
Dodatkowo upewnij się, że masz system Windows XP, Windows 2000, Windows Vista lub Windows Server 2003 oraz, że gra GTA:SA działa na twoim sprzęcie. Weź pod uwagę to, że jeżeli grałeś w singleplayer'a na najniższych ustawieniach, to MTA będzie Ci działało wolniej ponieważ ma większe wymagania.
UWAGA: MTA:SA dział wyłącznie z GTA:SA v1.0. Jeżeli kupiłeś grę w ostatnim czasie, to jest duże prawdopodobieństwo, że masz nowszą wersję.
Jeżeli masz jakieś problemy to odwiedź stronę Znane Problemy, albo dołącz do nas na IRC @ irc://irc.multitheftauto.com/mta
Wymagania Systemowe
Minimalne wymagania sprzętowe dla Multi Theft Auto: San Andreas są nieco wieksze, niż najmniejsze wymagania do gry Grand Theft Auto: San Andreas.
- Intel Pentium 4 lub AMD Athlon XP
- 512MB DDR RAM
- Czysta instalacja gry Grand Theft Auto: San Andreas, wersja 1.0 (Amerykańska lub Europejska)
- 3.7GB wolnej przestrzeni na dysku twardym (3.6GB dla instalacji minimalnej Grand Theft Auto)
- nVidia GeForce seria 4 lub ATI Radeon seria 8xxx (64MB RAM i kompatybilność z DirectX 9.0)
- Karta dźwiękowa kompatybilna z DirectX 9.0
- Klawiatura i myszka
- Połączenie do internetu
Dla lepszych efektów, karta graficzna kompatybilna z Pixel Shader 2.0 (nVidia GeForce seria FX lub nowsza, ATI Radeon seria 9xxx lub nowsza).
Dla szybszego ładowania się modeli i textur należy zwiększyć pamięć RAM.
Installing the game
This section will need to be updated when we get an installer
- If you haven't already, download the MTA:SA client from the download page at mtasa.com.
- Run the installer. You will be asked which components to install:
- Client interfaces with the game and is a required component.
- MTA Server enables you to host your own home-brew server
- MTA Server > Editor is used to create new maps, this is an optional component
- You are then asked for a folder in which to install the mod. This can by anywhere and doesn't have to be in you San Andreas directory.
- Next, you will be asked for the directory where you have San Andreas installed. The default location is: C:\Program Files\Rockstar Games\GTA San Andreas\.
- When the installation completes, you will be given the option to start MTA: San Andreas straight away. Choose your option and then press Finish.
- You will be able to launch MTA:DM from your Start Menu if you wish to play.
Uruchomienie gry
- Uruchom Multi Theft Auto klikając na ikonkę multiplayera podpisaną MTA:San Andreas w Menu Start.
- GTA: San Andreas się uruchomi i po załadowaniu się niezbędnych elementów ujrzysz główne menu MTA:SA. Tutaj znajdziesz kilka opcji:
|
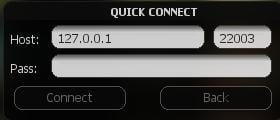
Quick connect – Przy pomocy tej opcji możesz połączyć się z serwerem gry, którego adres IP lub URL oraz Port znasz. opcja jest bardzo przydatna, jeżeli znasz adres i port serwera i nie chce Ci się szukać go pośród innych serwerów w wyszukiwarce.
| |
|
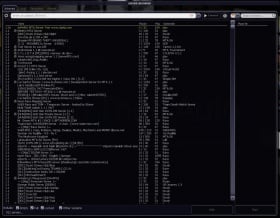
Browse servers – Dzięki tej opcji masz dostęp do listy wszystkich działających serwerów.
| |
|
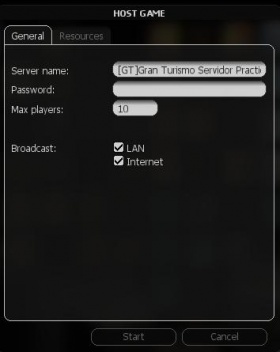
Host game – Dzięki tej opcji możesz założyć własny serwer.
| |
|
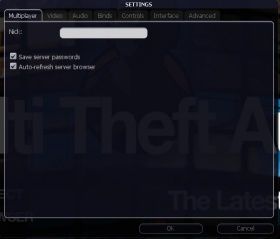
Settings – Tutaj możesz zmienić m.in: swój nick używany w grze, klawisze, opcje grafiki i kilka innych rzeczy.
| |
|
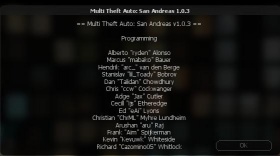
About – Tutaj są wymienieni wszyscy, którzy mieli wkład w rozwój projektu.
| |
|
Map editor – Tutaj możesz tworzyć własne mapy, wstawiać checkpointy, rampy, pickupy i inne obiekty. później możesz to dodać do plików serwera i grać z innymi graczami na świeżo zrobionych mapach.
| |
|
|
Quit – Wybranie tej opcji spowoduje zamknięcie MTA i powrót do pulpitu.
|
Najprostszym sposobem by grać, jest wybranie opcji Browse Servers z menu. Jeżeli serwery się nie wyświetlają kliknij przycisk Refresh, a MTA zacznie szukać serwerów, a następnie je wyświetli w formie listy.
- W kolumnie Name są wyświetlane nazwy serwerów.
- W kolumnie Players wyświetla się liczba graczy grających i maksymalna mogąca wejść na serwer w formacie [Liczba slotów zajętych] / [Liczba maksymalna slotów].
- W kolumnie Ping jest wyświetlany Ping (opóźnienie) miedzy Twoją maszyną, a maszyną serwera. Ping to miara czasu, w jakim "pakiety" danych są przesyłane od Ciebie na serwer i spowrotem, czyli większy ping oznacza dłuższy czas wędrówki pakietów, a tym samym lag. Generalnie serwery usytuowane bliżej Ciebie mają mniejsze pingi.
- W kolumnie Host jest podany adres IP serwerów. mozesz używać tego adresu by później łączyć się z danym serwerem przy pomocy opcji Quick connect z głownego menu.
Each tab can be clicked to arrange the respective column in ascending or descending order.
For optimal performance and gameplay, look for the best balance between players and ping.
Once you have picked a server, select it and click the Connect button in the top right-hand corner of the dialog. If all goes well, you should connect to the server and automatically join the game.
How to Play
MTA:SA offers a comprehensive scripting system that allows map creators to customize many elements of the game in order to create their own innovative game modes. The game incorporates as many single player elements as possible but some aspects are different.
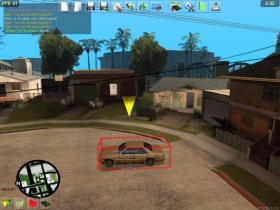
There are no pedestrians and no AI traffic on the road. The only other people on the map are your opponents, or allies if it is a team game. You can talk with them using the chatbox located in the left-hand corner of the screen by pressing T. To chat only to your team members, press Y.
MTA's map editor allows map creators to add various GTA objects to their maps including roads, exploding barrels, ramps, buildings, hills and more. Not only this, but the objects can be scripted to move, change model and disappear. This offers a great deal of fun and variation to the gameplay.
Holding Tab will display the scoreboard. By default, only names and pings are displayed, but scripts can add extra columns that are specific to the particular gamemode being played. For example, a deathmatch game mode would definitely have a column listing total kills, but the map creator may choose to add extra columns for the number of deaths you have and how long you have been playing for, in order to put your score into perspective.
Controls
In-Game Keys
- F8 (or Tilde Key) - Console
- F9 - In-game help
- F11 - Show SA map (the following list is for use when the map is up)
- numpad /- - Zoom in and out
- numpad 4, 8, 6, 2 - move map left, up, right, down
- numpad 0 - toggle between attach to local player (map follows player blip) and free move (map stays stationary)
- F12 - Take a screenshot
- T - Chat
- Y - Team Chat
- TAB - Player List (if Scoreboard resource is running on the server)
Console Commands
bind defaults Binds control defaults in the settings menu
Press ~ (tilde) or F8 to access the console, then type a command followed by any neccessary parameters (if applicable) then press Enter.
- maps
- This displays a list of all maps available on the server.
- nick [nickname]
- This changes your nickname whilst in-game to whatever you specify in the parameters.
- msg [nickname] [message] or pm [nickname] [message]
- This sends a private message to the person you specify in the [nickname] parameter. Only the person you specify can see the message. Both msg and pm perform the same function.
- quit or exit
- This disconnects you from the server and returns you to the Windows desktop. Performs the same function as the Quit button on the main menu.
- ver
- This displays the version number and copyright information for the software.
- sver
- This displays the version number of the server you are connected to.
- time
- This displays the current time.
- disconnect
- This disconnects you from the server and returns you to the main menu.
- say [text]
- This enables you to continue talking to people in the chat box whilst the console is open.
- ignore [nickname]
- This will not display any text typed by the player you wish to ignore. To stop ignoring a player, type ignore [nickname] again.
Tip: You can use these commands in the chatbox by putting a / (forward slash) in front of them.
A list of console commands can be seen by typing help into the console and pressing Enter. The current map may also have extra commands which can be accessed by typing commands into the console.
Error codes and their meanings
Download errors
0: UNKNOWN_ERROR
1: INVALID_FILE_DESCRIPTORS
2: INVALID_MAX_FILE_DESCRIPTOR
3: INVALID_SELECT_RETURN
4: INVALID_INITIAL_MULTI_PERFORM
5: INVALID_MULTI_PERFORM_CODE
6: INVALID_MULTI_PERFORM_CODE_NEW_DOWNLOADS
7: UNEXPECTED_CURL_MESSAGE
8: UNABLE_TO_CONNECT
9: UNABLE_TO_DOWNLOAD_FILE
10: FAILED_TO_INITIALIZE_DOWNLOAD
Fatal errors
1: no local player model on ingame event
2: no local player on ingame event
3: server downloads disabled
4: no local player model on player-list packet
5: no local player on player-list packet
6: invalid custom data length on entity-add packet
7: invalid bitstream data on entity-add packet
8: system entity on entity-add packet
9: failed to create object on entity-add packet
10: failed to create pickup on entity-add packet
11: failed to create vehicle on entity-add packet
12: invalid team-name length on entity-add packet
13: invalid lua-event name length in lua-event packet
14: invalid resource name length in resource-start packet
'Unable to enter vehicle' errors
1: script cancelled
2: script cancelled (jack)
3: current occupier is entering/exiting
4: invalid seat
5: not close enough
6: already in a vehicle
7: already entering/exiting
8: invalid vehicle (trailer)
