IT/Manuale del Client: Difference between revisions
No edit summary |
|||
| Line 52: | Line 52: | ||
# Potrai avviare MTA:DM da '''Start Menu\Tutti i programmi\MTA San Andreas\Play MTA San Andreas''' se vuoi giocare. | # Potrai avviare MTA:DM da '''Start Menu\Tutti i programmi\MTA San Andreas\Play MTA San Andreas''' se vuoi giocare. | ||
== | ==Avviare il gioco== | ||
# | # Avvia Multi Theft Auto cliccando sull'icona in '''Start Menu\Tutti i programmi\MTA San Andreas\Play MTA San Andreas'''. | ||
# GTA: San Andreas | # GTA: San Andreas si avvierà e, quando tutto sarà caricato, vedrete il menu principale di MTA. Qui troverai svariate opazioni: | ||
{| border="0" align="center" | {| border="0" align="center" | ||
| Line 60: | Line 60: | ||
[[Image:MENU_QuickConnect.jpg]] | [[Image:MENU_QuickConnect.jpg]] | ||
| width="380" | | | width="380" | | ||
<font size="-1" face="tahoma,helvetica,arial,sans-serif">'''Quick connect''' – | <font size="-1" face="tahoma,helvetica,arial,sans-serif">'''Quick connect''' – ti permette di connetterti a un server di cui conosci già l'indirizzo IP o l'URL e la porta. È utile se sai già in quale server entrare e così non hai bisogno di cercarlo nell'intera lista di server.</font> | ||
<br /> | <br /> | ||
| Line 67: | Line 67: | ||
[[Image:MENU_ServerBrowser.jpg|280px]] | [[Image:MENU_ServerBrowser.jpg|280px]] | ||
| width="380" | | | width="380" | | ||
<font size="-1" face="tahoma,helvetica,arial,sans-serif">'''Browse servers''' – | <font size="-1" face="tahoma,helvetica,arial,sans-serif">'''Browse servers''' – ti mostra una lista di server dove puoi giocare. </font> | ||
<br /> | <br /> | ||
| Line 74: | Line 74: | ||
[[Image:Settings.jpg|280px]] | [[Image:Settings.jpg|280px]] | ||
| width="380" | | | width="380" | | ||
<font size="-1" face="tahoma,helvetica,arial,sans-serif">'''Settings '''– | <font size="-1" face="tahoma,helvetica,arial,sans-serif">'''Settings '''– ti permette di cambiare il tuo nickname ingame, personalizzare i controlli e modificare i settaggi video.</font> | ||
<br /><br /> | <br /><br /> | ||
| Line 81: | Line 81: | ||
[[Image:MENU_About.jpg|280px]] | [[Image:MENU_About.jpg|280px]] | ||
| width="380" | | | width="380" | | ||
<font size="-1" face="tahoma,helvetica,arial,sans-serif">'''About '''– | <font size="-1" face="tahoma,helvetica,arial,sans-serif">'''About '''– ti mostra una lista di coloro che hanno contribuito a questo progetto.</font> | ||
<br /> | <br /> | ||
| Line 88: | Line 88: | ||
<br> | <br> | ||
| width="380" | | | width="380" | | ||
<font size="-1" face="tahoma,helvetica,arial,sans-serif">'''Map editor '''– | <font size="-1" face="tahoma,helvetica,arial,sans-serif">'''Map editor '''– ti permette di creare le tue mappe personalizzate, complete di checkpoints, rampe, pickup e altri oggetti. Possono anche essere caricate su un server per poterci giocare con gli amici.</font> | ||
<br /><br /> | <br /><br /> | ||
| Line 95: | Line 95: | ||
<br> | <br> | ||
| width="380" | | | width="380" | | ||
<font size="-1" face="tahoma,helvetica,arial,sans-serif">'''Quit '''– | <font size="-1" face="tahoma,helvetica,arial,sans-serif">'''Quit '''– ritorna al desktop di Windows.</font> | ||
<br /><br /> | <br /><br /> | ||
|} | |} | ||
Il modo più facile di giocare è premere '''Browse Servers''' nel menu. Apparirà una nuova finestra: | |||
<center>[[Image:manual_image006a.jpg]]</center> '''Will need to be updated''' | <center>[[Image:manual_image006a.jpg]]</center> '''Will need to be updated''' | ||
Revision as of 18:34, 27 January 2008
Introduzione
Multi Theft Auto: San Andreas è l'ultima di una lunga serie di mod multiplayer create dai fan per le versioni PC dei vari Grand Theft Auto. Trovate le versioni per GTA3 e Vice City che usano il vecchio core in http://www.multitheftauto.com. Questa mod non è approvata da Rockstar Games o Take 2 Interactive.
Per favore, ricorda che MTA:SA Deathmatch è una beta, il che significa che può crashare o generare risultati inaspettati.
Prima di iniziare
Prima di installare Multi Theft Auto: San Andreas, assicurati che non ci siano mod installate in GTA: San Andreas. Queste andrebbero in conflitto con MTA. Se vorresti continuare a usare le tue mod per il single player, puoi creare due installazioni reinstallando San Andreas in un'altra cartella del tuo Hard Disk.
Assicurati anche di stare usando Windows XP, Windows 2000, Windows Vista o Windows Server 2003 e che il tuo PC riesca a far girare San Andreas in single player. Ricorda che se raggiungi solo i requisiti minimi di San Andreas, potrebbero capitarti dei rallentamenti in MTA, visto che richiede una maggiore potenza di calcolo del processore.
Attenzione: MTA:SA funziona solo su GTA:SA versione 1.0. Se hai comprato il gioco recentemente, probabilmente hai una versione successiva.
Se riscontri dei problemi, dai un'occhiata a bugs noti e FAQ, o contattaci via IRC a irc://irc.multitheftauto.com/mta (in inglese).
Requisiti di sistema
I requisiti minimi di sistema di Multi Theft Auto: San Andreas sono leggermente più alti di quelli di Grand Theft Auto: San Andreas originale.
- Intel Pentium 4 o AMD Athlon XP
- 512MB DDR RAM
- Installazione pulista di Grand Theft Auto: San Andreas, versione 1.0 o 1.1 (americana o europea)
- 3.7GB di spazio libero nell'hard disk (3.6GB sono per un'installazione minima di GTA:SA)
- nVidia GeForce 4 series o ATI Radeon 8xxx series (compatibile con 64MB RAM e DirectX 9.0)
- Scheda audio compatibile con DirectX 9.0
- Tastiera e mouse
- Connessione a internet a banda larga (per un gioco online tranquillo)
Per le feature aggiuntive, una scheda video compatibile con il pixel shader 2.0 (nVidia GeForce FX series o superiore, ATI Radeon 9xxx series o superiore) è raccomandata.
Per un caricamento più rapido, è raccomandato un aumento di RAM.
Installare il gioco
- Se già non l'hai, registrati in http://www.mtabeta.com e scarica il client di MTA.
- Esegui l'installer. Riceverai un messaggio di introduzione, poi ti sarà presentato il Contratto di Licenza per l'Utente Finale (EULA). Dovrai acconsentire per continuare l'installazione.
- A questo punto potrai creare un account, usarne uno che hai già, o non usarne nessuno - in questo caso seleziona la seconda opzione
Prima opzione selezionata
Crea un account in MTABeta.com, dopo averlo fatto inserisci i tuoi dati per il nell'installer
Seconda opzione selezionata
Inserisci i dati del tuo account nell'installer
- Ti sarà richiesto quali componenti installare.
- Client è la mod che si interfaccia col gioco, ed è richiesta.
- MTA Server ti permette di hostare il tuo server casalingo.
- MTA Server > Editor è usato per creare nuove mappe, ed è una componente opzionale.
- Allora ti sarà chiesta la cartella dove è installato il gioco. Devi impostarla alla stessa cartella dove hai installato GTA. Di default è: C:\Programmi\Rockstar Games\GTA San Andreas\. Premi il bottone Install per iniziare l'installazione vera e propria.
- Quando finisce l'installazione, potrai decidere se avviare immediatamente MTA: San Andreas. Scegli l'opzione che vuoi e premi Finish.
- Potrai avviare MTA:DM da Start Menu\Tutti i programmi\MTA San Andreas\Play MTA San Andreas se vuoi giocare.
Avviare il gioco
- Avvia Multi Theft Auto cliccando sull'icona in Start Menu\Tutti i programmi\MTA San Andreas\Play MTA San Andreas.
- GTA: San Andreas si avvierà e, quando tutto sarà caricato, vedrete il menu principale di MTA. Qui troverai svariate opazioni:
|
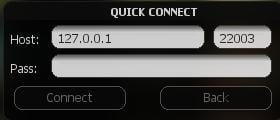
Quick connect – ti permette di connetterti a un server di cui conosci già l'indirizzo IP o l'URL e la porta. È utile se sai già in quale server entrare e così non hai bisogno di cercarlo nell'intera lista di server.
| |
|
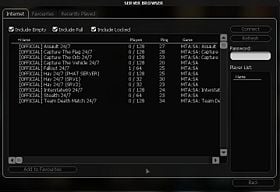
Browse servers – ti mostra una lista di server dove puoi giocare.
| |
|
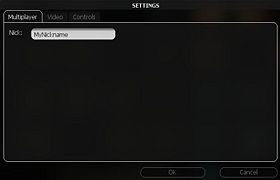
Settings – ti permette di cambiare il tuo nickname ingame, personalizzare i controlli e modificare i settaggi video.
| |
|
About – ti mostra una lista di coloro che hanno contribuito a questo progetto.
| |
|
|
Map editor – ti permette di creare le tue mappe personalizzate, complete di checkpoints, rampe, pickup e altri oggetti. Possono anche essere caricate su un server per poterci giocare con gli amici.
|
|
|
Quit – ritorna al desktop di Windows.
|
Il modo più facile di giocare è premere Browse Servers nel menu. Apparirà una nuova finestra:
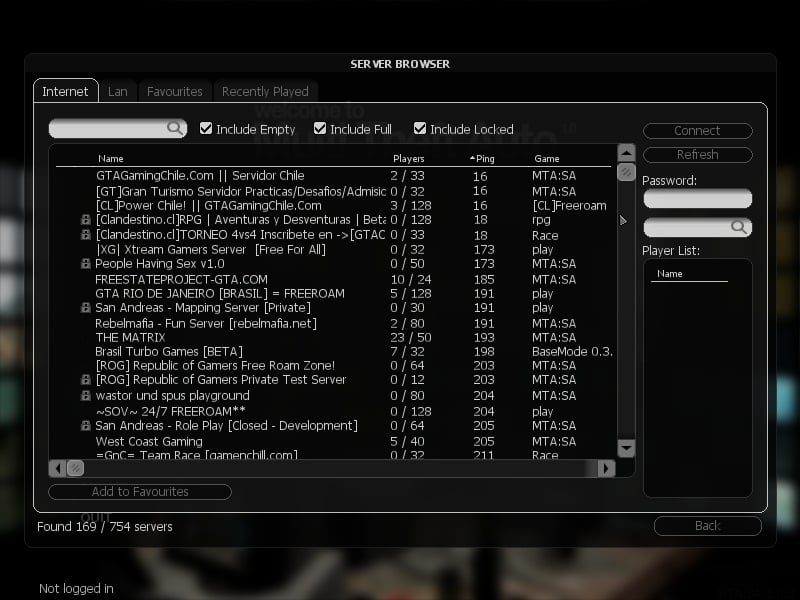
Will need to be updated
If servers have not appeared already, press the Refresh button and MTA will scan for servers, displaying them as a list.
- Under the Name tab, each server's name is displayed.
- Under the Players tab, the number of players and the maximum capacity of the server is displayed, in the format of [Used Slots] / [Maximum Slots].
- The Ping tab displays the ping, or latency, between your machine and the server. Ping is a measure of the time it takes for "packets" of data to be received back from the server after sending them, so a higher ping means that you will experience more lag on that particular server. Generally, servers closest to your location should have the lowest pings.
- The Host is the IP address of the server. You can use this address in future to connect to the same server via the Quick Connect option on the main menu.
Each tab can be clicked to arrange the respective column in ascending or descending order.
For optimal performance and gameplay, look for the best balance between players and ping.
Once you have picked a server, select it and click the Connect button in the top right-hand corner of the dialog. If all goes well, you should connect to the server and automatically join the game.
Running the game from ASE (The All-Seeing Eye)
If you are not satisfied with the in-game server browser of MTA:San Andreas, you might want to check out The All-Seeing Eye, which allows you to browse the server list out of the game, and can apply custom filters. This tutorial will help with the setup of ASE, and show how to make join on double-click work.
- Download ASE from http://videogames.yahoo.com/multiplayer , and install.
- This applies to MTA:SA up to version 1.0 dp2, and will probably be fixed in a later version
Download ASELauncher and extract ASELauncher.exe to your MTA directory (default C:\Program Files\MTA San Andreas). This tiny program converts the ASE command-line to a format MTA can understand. - Now add MTA:SA to your ASE games list:
- In ASE, click Tools -> Options, and select the tab Games
- Open the category Not installed and select Multi Theft Auto in the list
- Check Visible in filter list, click Browse and select ASELauncher.exe in your MTA San Andreas directory
- Leave the field Player name empty, and close the dialog with OK
- A new game Multi Theft Auto has appeared. When you click Refresh in the toolbar, you will see all servers for all versions of MTA. Now add a modifier to only show the current version, 1.0 dp2
- Right-click Multi Theft Auto and select New...
- In the lower-left, select Modifier and replace MYMOD by MTADP2
- Enter a name for the modifier in the Name field, e.g. MTA:SA 1.0 dp2
- Insert the following filter code (with the line number):
1 if version != "1.0dp2" remove - Click OK
- Your new modifier is shown under My filters
- All done! Now activate your modifier to only show your game version, select the game Multi Theft Auto, and double-click any server to play.
How to Play
MTA:SA offers a comprehensive scripting system that allows map creators to customize many elements of the game in order to create their own innovative game modes. The game incorporates as many single player elements as possible but some aspects are different.
There are no pedestrians and no AI traffic on the road. The only other people on the map are your opponents, or allies if it is a team game. You can talk with them using the chatbox located in the left-hand corner of the screen by pressing T. To chat only to your team members, press Y.
MTA's map editor allows map creators to add various GTA objects to their maps including roads, exploding barrels, ramps, buildings, hills and more. Not only this, but the objects can be scripted to move, change model and disappear. This offers a great deal of fun and variation to the gameplay.
Holding Tab will display the scoreboard. By default, only names and pings are displayed, but scripts can add extra columns that are specific to the particular gamemode being played. For example, a deathmatch game mode would definitely have a column listing total kills, but the map creator may choose to add extra columns for the number of deaths you have and how long you have been playing for, in order to put your score into perspective.
Controls
In-Game Keys
- F8 (or Tilde Key) - Console
- F9 - In-game help
- F11 - Show SA map (the following list is for use when the map is up)
- numpad +/- - Zoom in and out
- numpad 4, 8, 6, 2 - move map left, up, right, down
- numpad 0 - toggle between attach to local player (map follows player blip) and free move (map stays stationary)
- F12 - Take a screenshot
- T - Chat
- Y - Team Chat
- TAB - Player List (if Scoreboard resource is running on the server)
Console Commands
bind defaults Binds control defaults in the settings menu
Press ~ (tilde) or F8 to access the console, then type a command followed by any neccessary parameters (if applicable) then press Enter.
- maps
- This displays a list of all maps available on the server.
- nick [nickname]
- This changes your nickname whilst in-game to whatever you specify in the parameters.
- msg [nickname] [message] or pm [nickname] [message]
- This sends a private message to the person you specify in the [nickname] parameter. Only the person you specify can see the message. Both msg and pm perform the same function.
- quit or exit
- This disconnects you from the server and returns you to the Windows desktop. Performs the same function as the Quit button on the main menu.
- ver
- This displays the version number and copyright information for the software.
- time
- This displays the current time.
- disconnect
- This disconnects you from the server and returns you to the main menu.
- say [text]
- This enables you to continue talking to people in the chat box whilst the console is open.
- ignore [nickname]
- This will not display any text typed by the player you wish to ignore. To stop ignoring a player, type ignore [nickname] again.
Tip: You can use these commands in the chatbox by putting a / (forward slash) in front of them.
A list of console commands can be seen by typing help into the console and pressing Enter. The current map may also have extra commands which can be accessed by typing commands into the console.
Error codes and their meanings
Download errors
0: UNKNOWN_ERROR
1: INVALID_FILE_DESCRIPTORS
2: INVALID_MAX_FILE_DESCRIPTOR
3: INVALID_SELECT_RETURN
4: INVALID_INITIAL_MULTI_PERFORM
5: INVALID_MULTI_PERFORM_CODE
6: INVALID_MULTI_PERFORM_CODE_NEW_DOWNLOADS
7: UNEXPECTED_CURL_MESSAGE
8: UNABLE_TO_CONNECT
9: UNABLE_TO_DOWNLOAD_FILE
10: FAILED_TO_INITIALIZE_DOWNLOAD
Fatal errors
1: no local player model on ingame event
2: no local player on ingame event
3: server downloads disabled
4: no local player model on player-list packet
5: no local player on player-list packet
6: invalid custom data length on entity-add packet
7: invalid bitstream data on entity-add packet
8: system entity on entity-add packet
9: failed to create object on entity-add packet
10: failed to create pickup on entity-add packet
11: failed to create vehicle on entity-add packet
12: invalid team-name length on entity-add packet
13: invalid lua-event name length in lua-event packet
14: invalid resource name length in resource-start packet
'Unable to enter vehicle' errors
1: script cancelled
2: script cancelled (jack)
3: current occupier is entering/exiting
4: invalid seat
5: not close enough
6: already in a vehicle
7: already entering/exiting
8: invalid vehicle (trailer)
