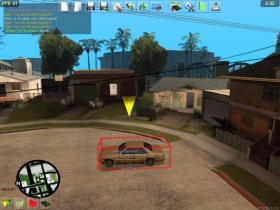
Client Manual: Difference between revisions
No edit summary |
Tag: Rollback |
||
| (81 intermediate revisions by 31 users not shown) | |||
| Line 1: | Line 1: | ||
==Before you start== | |||
Before you install Multi Theft Auto: San Andreas, first make sure that there are no modifications to GTA:SA installed. These will conflict with MTA. If you would like to keep your single-player mods, you can create two installations by reinstalling San Andreas to a second folder on your hard drive. | |||
Also, make sure that your machine is capable of running the game in single player. Note that if you are running single player on the absolute minimum requirements, you will experience slowdowns in MTA as it takes up extra processing power. | |||
{{Note| | |||
* MTA:SA will only work on GTA:SA '''v1.0'''. If you bought the game recently, it is likely that you have a later version.''' [[Known_Issues_-_FAQ#Does_MTASA_work_with_v1.01_or_v2.00_of_GTA_San_Andreas.3F| (More info)]] | |||
* If you have a Steam copy of GTA: San Andreas you should [[Known_Issues_-_FAQ#I_have_the_Steam_version_of_GTA_San_Andreas._How_can_I_play_MTASA.3F|read this first]]. | |||
}} | |||
== | ===System requirements=== | ||
====Minimum system requirements==== | |||
The minimum system requirements for Multi Theft Auto: San Andreas are '''slightly higher''' than the original minimum requirements for Grand Theft Auto: San Andreas: | |||
* Windows 7 or newer (Microsoft supported) operating system ([[Compatibility FAQ|XP and Vista do not work and are obsolete]]) | |||
* Intel Pentium 4 or AMD Athlon XP | |||
* 1 GB RAM | |||
* Clean installation of Grand Theft Auto: San Andreas, version 1.0 (American or European) | |||
* 3.7GB of free hard disk space (3.6GB for a minimum Grand Theft Auto installation; remember that MTA caches files from the servers that you play on and require disk space) | |||
* Nvidia GeForce 4 series or ATI Radeon 8xxx series (64MB VRAM and DirectX 9.0 compatible) | |||
* DirectX 9.0 compatible sound card | |||
* Keyboard and mouse | |||
* Internet access | |||
====Recommended system requirements==== | |||
* Windows 10 operating system | |||
* Intel Core 2 Duo Processor or AMD equivalent | |||
* 2 GB RAM | |||
* Clean installation of Grand Theft Auto: San Andreas, version 1.0 (American or European) | |||
* >5GB of free hard disk space (Remember that MTA caches files from the servers that you play on and require disk space) | |||
* Nvidia GeForce FX series or higher, ATI Radeon 9xxx series or higher, Pixel Shader 2.0 compatible | |||
* DirectX 9.0 compatible sound card | |||
* Keyboard and mouse | |||
* Broadband internet access (for smooth online play) | |||
====Notes==== | |||
* The minimum system requirements are considered the bare minimum for MTA: San Andreas, the performance can depend on the game modes that are running and the player count. | |||
* For extra loading performance, more RAM is recommended. | |||
* Make sure Windows is fully up to date. | |||
* Make sure you head over to the [[Known_Issues_-_FAQ|Known Issues]] page if you have issues, or join us on [https://discord.com/invite/mtasa Discord] and do so in the #help-support channel. | |||
==Installing the game== | |||
# If you haven't already, download the MTA:SA client from the download page at [http://mtasa.com mtasa.com]. | |||
# Run the installer, for Windows Vista and 7 it is required to run this with administrator rights. (The installer will ask.) | |||
# You need to accept the license that comes with MTA:SA (GPLv3). | |||
# You will be asked which components to install: | |||
#* '''Game Client''' interfaces with the game and is a required component. | |||
#* '''Dedicated Server''' enables you to host your own home-brew server. | |||
#** '''Core components''' and '''Game module''' are required components for the dedicated server. | |||
#** '''Core resources''' required resources for dedicated server. | |||
#** '''Optional resources''' additional resources for your dedicated server, gamemodes and maps. | |||
#** '''Editor''' is used to create new maps, this is an optional component. | |||
#* '''Development''' development tools. | |||
#** '''Module SDK''' development SDK for creating your own MTA server modules, this component requires C++ knowledge. | |||
#* '''Start menu group''' creates a start menu group for the installed components. | |||
#* '''Desktop icon''' creates a desktop icon for the client. | |||
# You are then asked for a folder in which to install the mod. This can by anywhere and doesn't have to be in you San Andreas directory. | |||
# Next, you will be asked for the directory where you have San Andreas installed. The default location is: '''C:\Program Files\Rockstar Games\GTA San Andreas\'''. | |||
# When the installation completes, you will be given the option to start MTA: San Andreas straight away. Choose your option and then press '''Finish'''. | |||
# You will be able to launch ''MTA San Andreas'' from your Start Menu if you wish to play. | |||
== | ==Running the game== | ||
# Start Multi Theft Auto by clicking the icon located in your Start Menu under '''MTA:San Andreas'''. | |||
# GTA: San Andreas will start and once it is loaded, you will be presented with the MTA:SA main menu. Here you will find several options (you could also watch a how-to tutorial [http://www.youtube.com/watch?v=ShiqnOazNYw here]): | |||
{| border="0" align="center" | |||
| width="188" | | |||
[[Image:Server_Browser.jpg|280px]] | |||
| width="380" | | |||
<font size="-1" face="tahoma,helvetica,arial,sans-serif">'''Browse servers''' – this allows you to receive a list of available servers to play on. </font> | |||
| | |||
[[ | |||
| | |||
<font size="-1" face="tahoma,helvetica,arial,sans-serif">'' ' | |||
<br /> | <br /> | ||
| | |- | ||
| | | width="188" | | ||
[[ | [[Image:Host_Game.jpg|280px]] | ||
| | | width="380" | | ||
<font size="-1" face="tahoma,helvetica,arial,sans-serif">'' ' | <font size="-1" face="tahoma,helvetica,arial,sans-serif">'''Host game''' – this allows you to start a local server. </font> | ||
<br /> | <br /> | ||
| | |- | ||
| | | width="188" | | ||
[[ | [[Image:Menu_Settings.JPG|280px]] | ||
| | | width="380" | | ||
<font size="-1" face="tahoma,helvetica,arial,sans-serif">'' ' | <font size="-1" face="tahoma,helvetica,arial,sans-serif">'''Settings '''– this allows you to change your in-game nickname, customize controls and adjust display settings.</font> | ||
<br /> <br /> | <br /><br /> | ||
| | |- | ||
| | | width="188" | | ||
[[ | [[Image:About_Menu.jpg|280px]] | ||
| | | width="380" | | ||
<font size="-1" face="tahoma,helvetica,arial,sans-serif">'' ' | <font size="-1" face="tahoma,helvetica,arial,sans-serif">'''About '''– this gives you a list of contributors to the project.</font> | ||
<br /> | <br /> | ||
| | |- | ||
| | | width="188" | | ||
[[ | [[Image:Map_Editor.jpg|280px]] | ||
| | | width="380" | | ||
<font size="-1" face="tahoma,helvetica,arial,sans-serif">'' ' | <font size="-1" face="tahoma,helvetica,arial,sans-serif">'''Map editor '''– this allows you to create your own maps, complete with checkpoints, ramps, pickups and other objects. These can then be uploaded onto a server so that you can play them with other people.</font> | ||
<br /> <br /> | <br /><br /> | ||
| | |- | ||
| | | width="188" | | ||
<br> | <br> | ||
| | | width="380" | | ||
<font size="-1" face="tahoma,helvetica,arial,sans-serif">'' 'Quit''' | <font size="-1" face="tahoma,helvetica,arial,sans-serif">'''Quit '''– this returns you back to your Windows desktop.</font> | ||
<br /> <br /> | <br /><br /> | ||
| | |} | ||
The easiest way to play the game is to click '''Browse Servers''' on the menu. If servers have not appeared already, press the '''Refresh''' button and MTA will scan for servers, displaying them as a list. | |||
* | * Under the '''Name''' tab, each server's name is displayed. | ||
* | * Under the '''Players''' tab, the number of players and the maximum capacity of the server is displayed, in the format of [Used Slots] / [Maximum Slots]. | ||
*'' 'Ping''' | * The '''Ping''' tab displays the ping, or latency, between your machine and the server. Ping is a measure of the time it takes for "packets" of data to be received back from the server after sending them, so a higher ping means that you will experience more lag on that particular server. Generally, servers closest to your location should have the lowest pings. | ||
*'' 'Host''' | * The '''Host''' is the IP address of the server. You can use this address in future to connect to the same server via the Quick Connect option on the main menu. | ||
Each tab can be clicked to arrange the respective column in ascending or descending order. | |||
For optimal performance and gameplay, look for the best balance between players and ping. | |||
Once you have picked a server, select it and click the '''Connect''' button in the top right-hand corner of the dialog. If all goes well, you should connect to the server and automatically join the game. | |||
== | ==How to Play== | ||
MTA: SA | MTA:SA offers a comprehensive scripting system that allows map creators to customize many elements of the game in order to create their own innovative game modes. The game incorporates as many single player elements as possible but some aspects are different. | ||
The only other people on the map are your opponents, or allies if it is a team game. You can talk with them using the chatbox located in the left-hand corner of the screen by pressing '''T'''. To chat only to your team members, press '''Y'''. | |||
MTA's map editor allows map creators to add various GTA objects to their maps including roads, exploding barrels, ramps, buildings, hills and more. Not only this, but the objects can be scripted to move, change model and disappear. This offers a great deal of fun and variation to the gameplay. | |||
Holding Tab | Holding Tab will display the scoreboard. By default, only names and pings are displayed, but scripts can add extra columns that are specific to the particular gamemode being played. For example, a deathmatch game mode would definitely have a column listing total kills, but the map creator may choose to add extra columns for the number of deaths you have and how long you have been playing for, in order to put your score into perspective. | ||
== == | ==Default Controls== | ||
=== In-Game Keys === | ===In-Game Keys=== | ||
* F8 ( | * F8 (or Tilde Key) - Console | ||
* F11 - Show SA map ''(the following list is for use when the map is up)'' | |||
* F11 - | **numpad /- - Zoom in and out | ||
** | **numpad 4, 8, 6, 2 - move map left, up, right, down | ||
** | **numpad 0 - toggle between attach to local player (map follows player blip) and free move (map stays stationary) | ||
** | * F12 - Take a screenshot | ||
* F12 - | |||
* T - Chat | * T - Chat | ||
* Y - Team Chat | * Y - Team Chat | ||
== | ===Resource Specific Keys=== | ||
These keys depend on the scripts that are running on the server. | |||
* F9 - In-game help (Help manager resource) | |||
* Z - Push to talk, if voice is enabled on the server. | |||
* TAB - Player List (if [[Scoreboard]] resource is running on the server) | |||
==Console Commands== | |||
'''bind defaults''' Binds control defaults in the settings menu | |||
'' ' | Press '''~ (tilde)''' or '''F8''' to access the console, then type a command followed by any necessary parameters (if applicable) then press Enter. | ||
;'''maps''' :This displays a list of all maps available on the server. | |||
;'' ' | ;'''nick [nickname]''' :This changes your nickname whilst in-game to whatever you specify in the parameters. | ||
;'' ' | ;'''msg [nickname] [message]''' or '''pm [nickname] [message]''' :This sends a private message to the person you specify in the [nickname] parameter. Only the person you specify can see the message. Both '''msg''' and '''pm''' perform the same function. | ||
;'' ' | ;'''quit''' or '''exit''' :This disconnects you from the server and returns you to the Windows desktop. Performs the same function as the Quit button on the main menu. | ||
;'' ' | ;'''ver''' :This displays the version number and copyright information for the software. | ||
;'' ' | ;'''sver''' :This displays the version number of the server you are connected to. | ||
;'' ' | ;'''time''' :This displays the current time. | ||
;'' ' | ;'''disconnect''' :This disconnects you from the server and returns you to the main menu. | ||
;'' ' | ;'''say [text]''' :This enables you to continue talking to people in the chat box whilst the console is open. | ||
;'' ' | ;'''ignore [nickname]''' :This will not display any text typed by the player you wish to ignore. To stop ignoring a player, type '''ignore [nickname]''' again. | ||
{{Tip|You can use these commands in the chatbox by putting a / (forward slash) in front of them.}} | |||
A list of console commands can be seen by typing '''help''' into the console and pressing Enter. The current map may also have extra commands which can be accessed by typing '''commands''' into the console. | |||
For information on more commands see: [[Client Commands]] | |||
==Error codes and their meanings== | |||
=== Download errors === | |||
:{| class="wikitable sortable" style="width: auto; table-layout: fixed;" | |||
|- | |||
!Code | |||
!scope="col" class="unsortable" | Meaning | |||
|- | |||
|0 | |||
|UNKNOWN_ERROR | |||
|- | |||
|1 | |||
|INVALID_FILE_DESCRIPTORS | |||
|- | |||
|2 | |||
|INVALID_MAX_FILE_DESCRIPTOR | |||
|- | |||
|3 | |||
|INVALID_SELECT_RETURN | |||
|- | |||
|4 | |||
|INVALID_INITIAL_MULTI_PERFORM | |||
|- | |||
|5 | |||
|INVALID_MULTI_PERFORM_CODE | |||
|- | |||
|6 | |||
|INVALID_MULTI_PERFORM_CODE_NEW_DOWNLOADS | |||
|- | |||
|7 | |||
|UNEXPECTED_CURL_MESSAGE | |||
|- | |||
|8 | |||
|UNABLE_TO_CONNECT | |||
|- | |||
|9 | |||
|UNABLE_TO_DOWNLOAD_FILE | |||
|- | |||
|10 | |||
|FAILED_TO_INITIALIZE_DOWNLOAD | |||
|} | |||
===Fatal errors=== | |||
:{| class="wikitable sortable" style="width: auto; table-layout: fixed;" | |||
|- | |||
!Code | |||
!scope="col" class="unsortable" | Meaning | |||
|- | |||
|1 | |||
|no local player model on ingame event | |||
|- | |||
|2 | |||
|no local player on ingame event | |||
|- | |||
|3 | |||
|server downloads disabled | |||
|- | |||
|4 | |||
|no local player model on player-list packet | |||
|- | |||
|5 | |||
|no local player on player-list packet | |||
|- | |||
|6 | |||
|invalid custom data length on entity-add packet | |||
|- | |||
|7 | |||
|invalid bitstream data on entity-add packet | |||
|- | |||
|8 | |||
|system entity on entity-add packet | |||
|- | |||
|9 | |||
|failed to create object on entity-add packet | |||
|- | |||
|10 | |||
|failed to create pickup on entity-add packet | |||
|- | |||
|11 | |||
|failed to create vehicle on entity-add packet | |||
|- | |||
|12 | |||
|invalid team-name length on entity-add packet | |||
|- | |||
|13 | |||
|invalid lua-event name length in lua-event packet | |||
|- | |||
|14 | |||
|invalid resource name length in resource-start packet | |||
|} | |||
== | ==='Unable to enter vehicle' errors=== | ||
'' | :{| class="wikitable sortable" style="width: auto; table-layout: fixed;" | ||
|- | |||
1 | !Code | ||
2 | !scope="col" class="unsortable" | Meaning | ||
3 | |- | ||
4 | |1 | ||
5 | |script cancelled | ||
6 | |- | ||
7 | |2 | ||
8 | |script cancelled (jack) | ||
|- | |||
|3 | |||
|current occupier is entering/exiting | |||
|- | |||
|4 | |||
|invalid seat | |||
|- | |||
|5 | |||
|not close enough | |||
|- | |||
|6 | |||
|already in a vehicle | |||
|- | |||
|7 | |||
|already entering/exiting | |||
|- | |||
|8 | |||
|invalid vehicle (trailer) | |||
|} | |||
==Special: Playing MTA on Linux or macOS?== | |||
If you're one of those who use other precious systems, and want to have the client working on your computer, | |||
please read the [[Client on Linux Manual]] or [[Client on Mac OS X Manual]]. | |||
[[ar:دليل_اللاعب]] | |||
[[cs:Client Manual]] | |||
[[de:MTA DM Client Anleitung]] | |||
[[en:Client Manual]] | |||
[[es:Manual Cliente Deathmatch]] | |||
[[fr:Manuel Client]] | |||
[[hu:Client Manual]] | |||
[[it:Manuale del Client]] | |||
[[nl:Deathmatch Client Manual]] | |||
[[pl:Client Manual]] | |||
[[pt-br:Manual do Cliente]] | |||
[[ru:Deathmatch Client Manual]] | |||
[[zh-cn:客户端手册]] | |||
[[ | [[Category:Support]] | ||
Latest revision as of 07:03, 15 June 2023
Before you start
Before you install Multi Theft Auto: San Andreas, first make sure that there are no modifications to GTA:SA installed. These will conflict with MTA. If you would like to keep your single-player mods, you can create two installations by reinstalling San Andreas to a second folder on your hard drive.
Also, make sure that your machine is capable of running the game in single player. Note that if you are running single player on the absolute minimum requirements, you will experience slowdowns in MTA as it takes up extra processing power.
Note:
|
System requirements
Minimum system requirements
The minimum system requirements for Multi Theft Auto: San Andreas are slightly higher than the original minimum requirements for Grand Theft Auto: San Andreas:
- Windows 7 or newer (Microsoft supported) operating system (XP and Vista do not work and are obsolete)
- Intel Pentium 4 or AMD Athlon XP
- 1 GB RAM
- Clean installation of Grand Theft Auto: San Andreas, version 1.0 (American or European)
- 3.7GB of free hard disk space (3.6GB for a minimum Grand Theft Auto installation; remember that MTA caches files from the servers that you play on and require disk space)
- Nvidia GeForce 4 series or ATI Radeon 8xxx series (64MB VRAM and DirectX 9.0 compatible)
- DirectX 9.0 compatible sound card
- Keyboard and mouse
- Internet access
Recommended system requirements
- Windows 10 operating system
- Intel Core 2 Duo Processor or AMD equivalent
- 2 GB RAM
- Clean installation of Grand Theft Auto: San Andreas, version 1.0 (American or European)
- >5GB of free hard disk space (Remember that MTA caches files from the servers that you play on and require disk space)
- Nvidia GeForce FX series or higher, ATI Radeon 9xxx series or higher, Pixel Shader 2.0 compatible
- DirectX 9.0 compatible sound card
- Keyboard and mouse
- Broadband internet access (for smooth online play)
Notes
- The minimum system requirements are considered the bare minimum for MTA: San Andreas, the performance can depend on the game modes that are running and the player count.
- For extra loading performance, more RAM is recommended.
- Make sure Windows is fully up to date.
- Make sure you head over to the Known Issues page if you have issues, or join us on Discord and do so in the #help-support channel.
Installing the game
- If you haven't already, download the MTA:SA client from the download page at mtasa.com.
- Run the installer, for Windows Vista and 7 it is required to run this with administrator rights. (The installer will ask.)
- You need to accept the license that comes with MTA:SA (GPLv3).
- You will be asked which components to install:
- Game Client interfaces with the game and is a required component.
- Dedicated Server enables you to host your own home-brew server.
- Core components and Game module are required components for the dedicated server.
- Core resources required resources for dedicated server.
- Optional resources additional resources for your dedicated server, gamemodes and maps.
- Editor is used to create new maps, this is an optional component.
- Development development tools.
- Module SDK development SDK for creating your own MTA server modules, this component requires C++ knowledge.
- Start menu group creates a start menu group for the installed components.
- Desktop icon creates a desktop icon for the client.
- You are then asked for a folder in which to install the mod. This can by anywhere and doesn't have to be in you San Andreas directory.
- Next, you will be asked for the directory where you have San Andreas installed. The default location is: C:\Program Files\Rockstar Games\GTA San Andreas\.
- When the installation completes, you will be given the option to start MTA: San Andreas straight away. Choose your option and then press Finish.
- You will be able to launch MTA San Andreas from your Start Menu if you wish to play.
Running the game
- Start Multi Theft Auto by clicking the icon located in your Start Menu under MTA:San Andreas.
- GTA: San Andreas will start and once it is loaded, you will be presented with the MTA:SA main menu. Here you will find several options (you could also watch a how-to tutorial here):
|
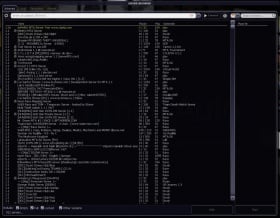
Browse servers – this allows you to receive a list of available servers to play on.
| |
|
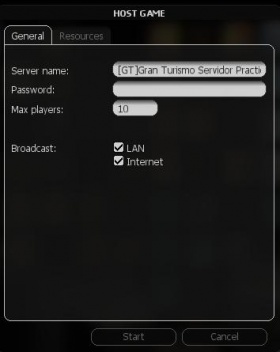
Host game – this allows you to start a local server.
| |
|
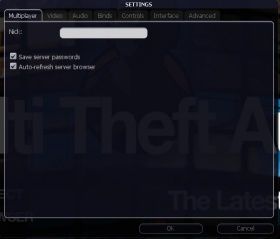
Settings – this allows you to change your in-game nickname, customize controls and adjust display settings.
| |
|
About – this gives you a list of contributors to the project.
| |
|
Map editor – this allows you to create your own maps, complete with checkpoints, ramps, pickups and other objects. These can then be uploaded onto a server so that you can play them with other people.
| |
|
|
Quit – this returns you back to your Windows desktop.
|
The easiest way to play the game is to click Browse Servers on the menu. If servers have not appeared already, press the Refresh button and MTA will scan for servers, displaying them as a list.
- Under the Name tab, each server's name is displayed.
- Under the Players tab, the number of players and the maximum capacity of the server is displayed, in the format of [Used Slots] / [Maximum Slots].
- The Ping tab displays the ping, or latency, between your machine and the server. Ping is a measure of the time it takes for "packets" of data to be received back from the server after sending them, so a higher ping means that you will experience more lag on that particular server. Generally, servers closest to your location should have the lowest pings.
- The Host is the IP address of the server. You can use this address in future to connect to the same server via the Quick Connect option on the main menu.
Each tab can be clicked to arrange the respective column in ascending or descending order.
For optimal performance and gameplay, look for the best balance between players and ping.
Once you have picked a server, select it and click the Connect button in the top right-hand corner of the dialog. If all goes well, you should connect to the server and automatically join the game.
How to Play
MTA:SA offers a comprehensive scripting system that allows map creators to customize many elements of the game in order to create their own innovative game modes. The game incorporates as many single player elements as possible but some aspects are different.
The only other people on the map are your opponents, or allies if it is a team game. You can talk with them using the chatbox located in the left-hand corner of the screen by pressing T. To chat only to your team members, press Y.
MTA's map editor allows map creators to add various GTA objects to their maps including roads, exploding barrels, ramps, buildings, hills and more. Not only this, but the objects can be scripted to move, change model and disappear. This offers a great deal of fun and variation to the gameplay.
Holding Tab will display the scoreboard. By default, only names and pings are displayed, but scripts can add extra columns that are specific to the particular gamemode being played. For example, a deathmatch game mode would definitely have a column listing total kills, but the map creator may choose to add extra columns for the number of deaths you have and how long you have been playing for, in order to put your score into perspective.
Default Controls
In-Game Keys
- F8 (or Tilde Key) - Console
- F11 - Show SA map (the following list is for use when the map is up)
- numpad /- - Zoom in and out
- numpad 4, 8, 6, 2 - move map left, up, right, down
- numpad 0 - toggle between attach to local player (map follows player blip) and free move (map stays stationary)
- F12 - Take a screenshot
- T - Chat
- Y - Team Chat
Resource Specific Keys
These keys depend on the scripts that are running on the server.
- F9 - In-game help (Help manager resource)
- Z - Push to talk, if voice is enabled on the server.
- TAB - Player List (if Scoreboard resource is running on the server)
Console Commands
bind defaults Binds control defaults in the settings menu
Press ~ (tilde) or F8 to access the console, then type a command followed by any necessary parameters (if applicable) then press Enter.
- maps
- This displays a list of all maps available on the server.
- nick [nickname]
- This changes your nickname whilst in-game to whatever you specify in the parameters.
- msg [nickname] [message] or pm [nickname] [message]
- This sends a private message to the person you specify in the [nickname] parameter. Only the person you specify can see the message. Both msg and pm perform the same function.
- quit or exit
- This disconnects you from the server and returns you to the Windows desktop. Performs the same function as the Quit button on the main menu.
- ver
- This displays the version number and copyright information for the software.
- sver
- This displays the version number of the server you are connected to.
- time
- This displays the current time.
- disconnect
- This disconnects you from the server and returns you to the main menu.
- say [text]
- This enables you to continue talking to people in the chat box whilst the console is open.
- ignore [nickname]
- This will not display any text typed by the player you wish to ignore. To stop ignoring a player, type ignore [nickname] again.
| Tip: You can use these commands in the chatbox by putting a / (forward slash) in front of them. |
A list of console commands can be seen by typing help into the console and pressing Enter. The current map may also have extra commands which can be accessed by typing commands into the console.
For information on more commands see: Client Commands
Error codes and their meanings
Download errors
Code Meaning 0 UNKNOWN_ERROR 1 INVALID_FILE_DESCRIPTORS 2 INVALID_MAX_FILE_DESCRIPTOR 3 INVALID_SELECT_RETURN 4 INVALID_INITIAL_MULTI_PERFORM 5 INVALID_MULTI_PERFORM_CODE 6 INVALID_MULTI_PERFORM_CODE_NEW_DOWNLOADS 7 UNEXPECTED_CURL_MESSAGE 8 UNABLE_TO_CONNECT 9 UNABLE_TO_DOWNLOAD_FILE 10 FAILED_TO_INITIALIZE_DOWNLOAD
Fatal errors
Code Meaning 1 no local player model on ingame event 2 no local player on ingame event 3 server downloads disabled 4 no local player model on player-list packet 5 no local player on player-list packet 6 invalid custom data length on entity-add packet 7 invalid bitstream data on entity-add packet 8 system entity on entity-add packet 9 failed to create object on entity-add packet 10 failed to create pickup on entity-add packet 11 failed to create vehicle on entity-add packet 12 invalid team-name length on entity-add packet 13 invalid lua-event name length in lua-event packet 14 invalid resource name length in resource-start packet
'Unable to enter vehicle' errors
Code Meaning 1 script cancelled 2 script cancelled (jack) 3 current occupier is entering/exiting 4 invalid seat 5 not close enough 6 already in a vehicle 7 already entering/exiting 8 invalid vehicle (trailer)
Special: Playing MTA on Linux or macOS?
If you're one of those who use other precious systems, and want to have the client working on your computer, please read the Client on Linux Manual or Client on Mac OS X Manual.
