ZH-CN/guiCreateWindow
Jump to navigation
Jump to search
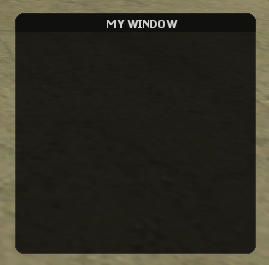
此函数用于创建新的GUI窗口. This provides a base for other gui elements to be created within. However, windows do not have a parent and cannot be created in any GUI elements.
语法
element guiCreateWindow ( float x, float y, float width, float height, string titleBarText, bool relative )
OOP 语法 什么是OOP?
- 方法: GuiWindow(...)
必填参数
- x: 玩家屏幕上图形用户界面窗口的2D x 位置的浮动. This is affected by the relative argument.
- y: 玩家屏幕上GUI窗口的2D y 位置的浮动. This is affected by the relative argument.
- width: GUI窗口宽度的浮动. This is affected by the relative argument.
- height: GUI窗口高度的浮动. This is affected by the relative argument.
- titleBarText: 将显示在窗口标题栏中的文本字符串.
- relative: 尺寸和位置是否是相对的. 如果这是“true”,则所有x、y、width和height浮动必须介于0和1之间, 将 大小/位置 表示为屏幕大小的一部分. 如果“false”,则大小和坐标基于客户端的分辨率,可使用guiGetScreenSize访问.
返回值
如果gui窗口元素创建成功,则返回该元素,否则返回false.
示例
示例 1: 本例创建了一个信息窗口,并向“tabPanel”tabPanel添加了两个选项卡,并向其中添加了一些其他gui元素
local myWindow = guiCreateWindow ( 0, 0, 0.5, 0.4, "Information", true )  -- 创建一个在标题栏中有“信息”的窗口.
local tabPanel = guiCreateTabPanel ( 0, 0.1, 1, 1, true, myWindow )       -- 创建一个填充整个窗口的选项卡面板
local tabMap = guiCreateTab( "Map Information", tabPanel )                -- 在“tabPanel”上创建一个名为“Map Information”的选项卡
local tabHelp = guiCreateTab( "Help", tabPanel )                          -- 在“tabPanel”上创建另一个名为“Help”的选项卡

-- 向每个选项卡添加标签(文本)
guiCreateLabel(0.02, 0.04, 0.94, 0.2, "这是有关当前地图的信息", true, tabMap)
guiCreateLabel(0.02, 0.04, 0.94, 0.92, "这是帮助文本.", true, tabHelp)
示例 2: 这个例子创建了一个武器选择屏幕,包括一个窗口、网格列表和一个按钮. 用户可以选择猎枪或机枪. 窗口不能移动,也不能调整大小.
--设置一些表格

shotguns = {
      "chrome",
      "sawn-off",
      "combat"
}

machineGun = {
      "m4",
      "ak-47"
}

function setupWeaponSelection ( theResource )
      -- getResourceRootElement(getThisResource()) at the bottom means it will only create the gui on this resource start
      -- 为我们的屏幕创建一个窗口,标题为“选择你的武器”.
      spawnScreenMenu = guiCreateWindow ( 0.15, 0.33, 0.7, 0.34, "Select your weapons", true )
      -- 创建一个OK按钮,允许用户确认他们的选择,并将其附加到confirmSelection函数
      spawnScreenOKButton = guiCreateButton ( 0.4, 0.85, 0.20, 0.15, "OK", true, spawnScreenMenu )
      -- 确保用户不能移动或调整屏幕大小.
      guiWindowSetMovable ( spawnScreenMenu, false )
      guiWindowSetSizable ( spawnScreenMenu, false )
      -- 创建我们的gridlist,它占据了大部分窗口.
      spawnScreenGridList = guiCreateGridList ( 0, 0.1, 1, 0.9, true, spawnScreenMenu )
      guiGridListSetSelectionMode ( spawnScreenGridList, 2 ) -- ensure the selection mode is one per column
      -- 既然我们有两套武器,就为散弹枪和机关枪创建一个纵队
      guiGridListAddColumn ( spawnScreenGridList, "Shotguns", 0.3 )
      guiGridListAddColumn ( spawnScreenGridList, "Machine guns", 0.3 )
      -- 接下来,我们循环遍历handguns表,将handgun项添加到gridlist中
      for key,weaponName in pairs(shotguns) do
            -- 每次向我们的gridlist添加一个新行
            local row = guiGridListAddRow ( spawnScreenGridList )
            -- 接下来,我们将该行的文本设置为武器名称。列是1,因为“Shotguns”列是首先创建的.
            guiGridListSetItemText ( spawnScreenGridList, row, 1, weaponName, false, false )
      end
      -- 我们对其他武器列表重复这个过程,改变列号
      row = 0
      for key,weaponName in pairs(machineGun) do
            -- 我们不需要像在上一个循环中那样创建新行
            -- 我们只是将行的文本设置为武器名称.列是2,因为“机枪”列是第二个创建的.
            guiGridListSetItemText ( spawnScreenGridList, row, 2, weaponName, false, false )
            row = row + 1 -- 增加行号
      end
end
addEventHandler ( "onClientResourceStart", getResourceRootElement(getThisResource()), setupWeaponSelection )
See Also
General functions
- guiBringToFront
- getChatboxLayout
- getChatboxCharacterLimit
- guiCreateFont
- guiBlur
- guiFocus
- guiGetAlpha
- guiGetCursorType
- guiGetEnabled
- guiGetFont
- guiGetInputEnabled
- guiGetInputMode
- guiGetPosition
- guiGetProperties
- guiGetProperty
- guiGetScreenSize
- guiGetSize
- guiGetText
- guiGetVisible
- guiMoveToBack
- guiSetAlpha
- guiSetEnabled
- guiSetFont
- guiSetInputEnabled
- guiSetInputMode
- guiSetPosition
- guiSetProperty
- guiSetSize
- guiSetText
- guiSetVisible
- isChatBoxInputActive
- isConsoleActive
- isDebugViewActive
- isMainMenuActive
- isMTAWindowActive
- isTransferBoxActive
- setChatboxCharacterLimit
- setDebugViewActive
Browsers
Buttons
Checkboxes
Comboboxes
- guiCreateComboBox
- guiComboBoxAddItem
- guiComboBoxClear
- guiComboBoxGetItemCount
- guiComboBoxGetItemText
- guiComboBoxGetSelected
- guiComboBoxIsOpen
- guiComboBoxRemoveItem
- guiComboBoxSetItemText
- guiComboBoxSetOpen
- guiComboBoxSetSelected
Edit Boxes
- guiCreateEdit
- guiEditGetCaretIndex
- guiEditGetMaxLength
- guiEditIsMasked
- guiEditIsReadOnly
- guiEditSetCaretIndex
- guiEditSetMasked
- guiEditSetMaxLength
- guiEditSetReadOnly
Gridlists
- guiCreateGridList
- guiGridListAddColumn
- guiGridListAddRow
- guiGridListAutoSizeColumn
- guiGridListClear
- guiGridListGetColumnCount
- guiGridListGetColumnTitle
- guiGridListGetColumnWidth
- guiGridListGetHorizontalScrollPosition
- guiGridListGetItemColor
- guiGridListGetItemData
- guiGridListGetItemText
- guiGridListGetRowCount
- guiGridListGetSelectedCount
- guiGridListGetSelectedItem
- guiGridListGetSelectedItems
- guiGridListGetSelectionMode
- guiGridListIsSortingEnabled
- guiGridListGetVerticalScrollPosition
- guiGridListInsertRowAfter
- guiGridListRemoveColumn
- guiGridListRemoveRow
- guiGridListSetColumnTitle
- guiGridListSetColumnWidth
- guiGridListSetHorizontalScrollPosition
- guiGridListSetItemColor
- guiGridListSetItemData
- guiGridListSetItemText
- guiGridListSetScrollBars
- guiGridListSetSelectedItem
- guiGridListSetSelectionMode
- guiGridListSetSortingEnabled
- guiGridListSetVerticalScrollPosition
Memos
- guiCreateMemo
- guiMemoGetCaretIndex
- guiMemoGetVerticalScrollPosition
- guiMemoSetVerticalScrollPosition
- guiMemoIsReadOnly
- guiMemoSetCaretIndex
- guiMemoSetReadOnly
Progressbars
Radio Buttons
Scrollbars
Scrollpanes
- guiCreateScrollPane
- guiScrollPaneGetHorizontalScrollPosition
- guiScrollPaneGetVerticalScrollPosition
- guiScrollPaneSetHorizontalScrollPosition
- guiScrollPaneSetScrollBars
- guiScrollPaneSetVerticalScrollPosition
Static Images
Tab Panels
Tabs
Text Labels
- guiCreateLabel
- guiLabelGetColor
- guiLabelGetFontHeight
- guiLabelGetTextExtent
- guiLabelSetColor
- guiLabelSetHorizontalAlign
- guiLabelSetVerticalAlign
Windows
Input
GUI
- onClientGUIAccepted
- onClientGUIBlur
- onClientGUIChanged
- onClientGUIClick
- onClientGUIComboBoxAccepted
- onClientGUIDoubleClick
- onClientGUIFocus
- onClientGUIMouseDown
- onClientGUIMouseUp
- onClientGUIMove
- onClientGUIScroll
- onClientGUISize
- onClientGUITabSwitched
- onClientMouseEnter
- onClientMouseLeave
- onClientMouseMove
- onClientMouseWheel
